介紹
Google cloud vm虛擬器掛載storage,使用BT腳本下載至storage,如此可以下載非常多的檔案不怕空間不夠,最近剛好看到玩了一下真的很實用,如果買一個VPS也可以這樣搞,掛載到storage,storage拿來當個人儲存硬碟價格滿便宜的,有興趣可以去google storage看看可以試算價格,介紹如何掛載storage。
作業系統及工具
建立storage

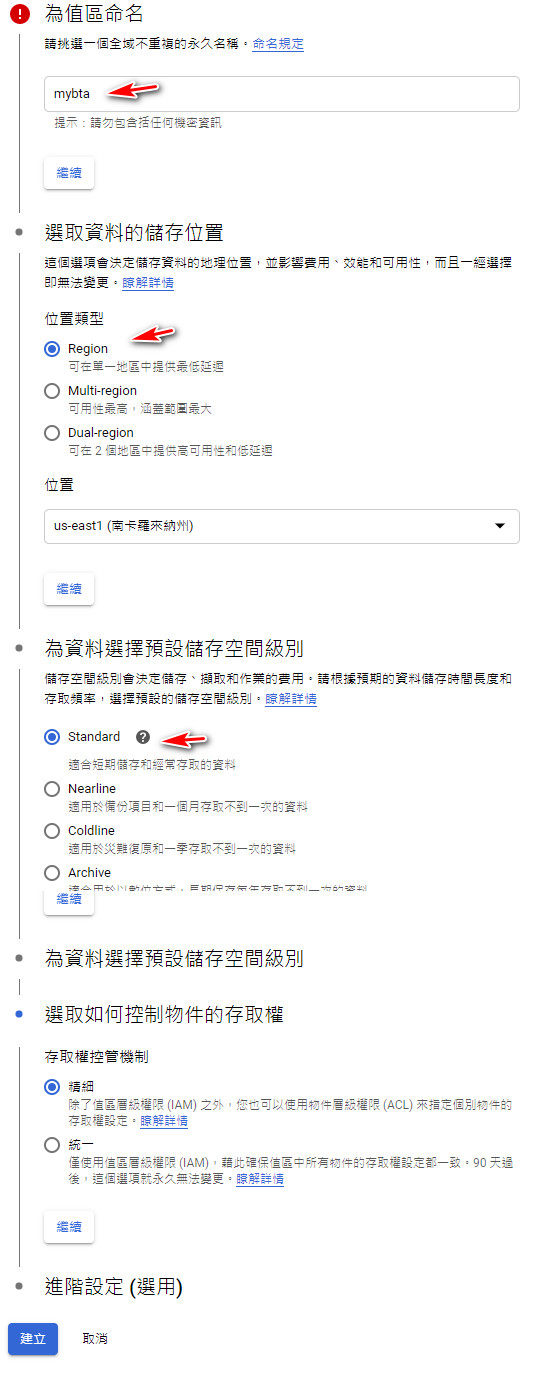
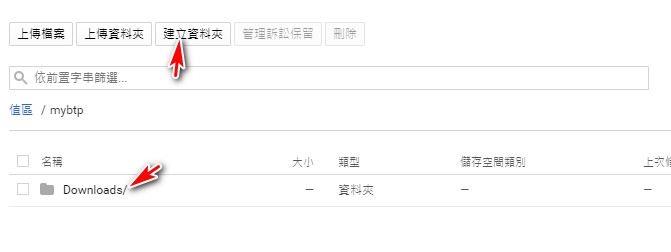
建立一個資料夾
資料名稱依個人喜好,Downloads
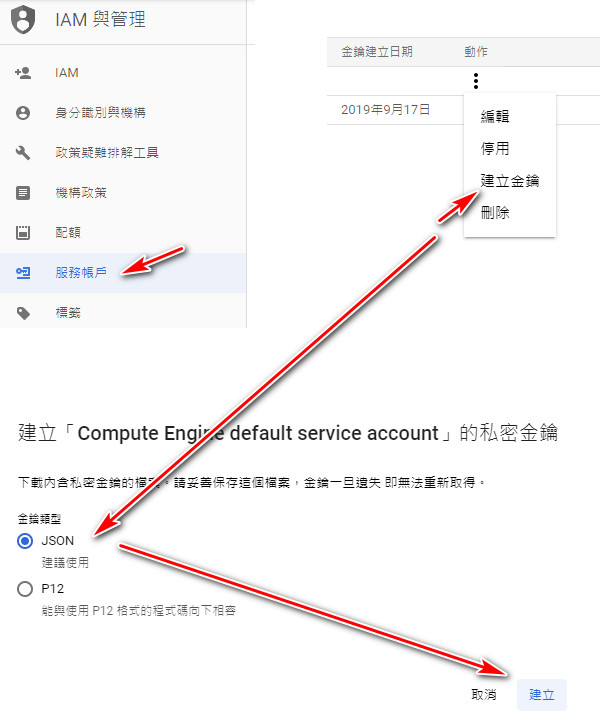
下載storage金鑰
保存好金鑰,等等需要上傳到伺服器。
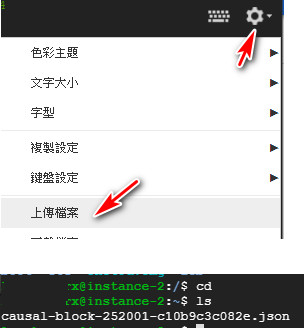
將金鑰上傳至伺服器
使用SSH網頁版上傳檔案,你也可以使用FTP,FTP上傳權限可以看這篇
輸入ls 確認有出現檔案。
建立資料夾
sudo mkdir /mnt/plextvdrive
sudo mkdir /mnt/資料夾名稱
改資料夾權限
sudo chmod -R 777 /mnt/plextvdrive
sudo chmod -R 777 /mnt/資料夾名稱
設定gcsfuse
export GCSFUSE_REPO=gcsfuse-`lsb_release -c -s`
echo "deb http://packages.cloud.google.com/apt $GCSFUSE_REPO main" | sudo tee /etc/apt/sources.list.d/gcsfuse.list
curl https://packages.cloud.google.com/apt/doc/apt-key.gpg | sudo apt-key add -
安裝gcsfuse
sudo apt-get update
sudo apt-get install gcsfuse
掛載設定
注意:金鑰json檔案名稱請改成你的金鑰json
Bucket名稱 也就是在storage建立所取的名稱
/mnt/plextvdrive 之前建立的資料夾位置
gcsfuse -o allow_other --gid 0 --uid 0 --file-mode 777 --dir-mode 777 --key-file /home/用戶名/causal-block-252001-c10b9c3c082e.json Bucket名稱 /mnt/plextvdrive輸入之後會有一個問題,將user_allow_other打開
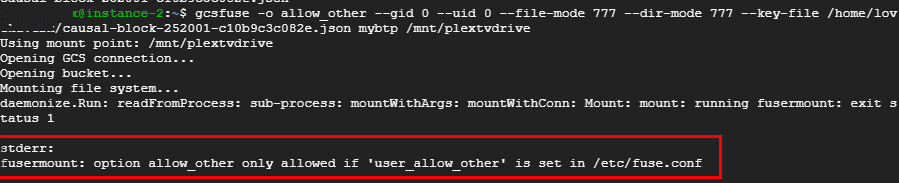
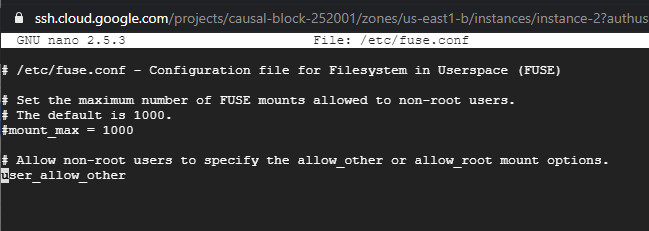
打開user_allow_other
sudo nano /etc/fuse.conf將#user_allow_other 的# 拿掉,儲存快捷鍵 Ctrl + x 按下Y
再次執行gcsfuse命令
gcsfuse -o allow_other --gid 0 --uid 0 --file-mode 777 --dir-mode 777 --key-file /home/用戶名/causal-block-252001-c10b9c3c082e.json Bucket名稱 /mnt/plextvdrive
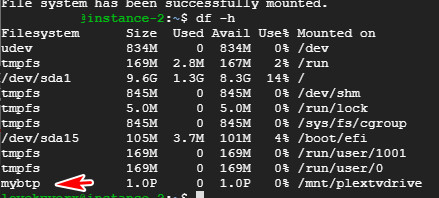
檢查是否有掛載成功
df -h成功掛載,並顯示空間有1.0 P 相當於1000TB。
設定掛載路徑
掛載路徑是在/mnt/plextvdrive,但是需要下載到storage的Downloads資料夾才是正確的位置,所以正確路徑為/mnt/plextvdrive/Downloads。
關機虛擬器之後再次開機掛載消失
只需要在執行一次掛載指令就可以掛載成功
gcsfuse -o allow_other --gid 0 --uid 0 --file-mode 777 --dir-mode 777 --key-file /home/用戶名/causal-block-252001-c10b9c3c082e.json Bucket名稱 /mnt/plextvdrive筆記指令
sudo apt-get update
sudo mkdir /mnt/nameofyourplexfolder
sudo chmod -R 777 /mnt/nameofyourplexfolder
export GCSFUSE_REPO=gcsfuse-`lsb_release -c -s`
echo "deb http://packages.cloud.google.com/apt $GCSFUSE_REPO main" | sudo tee /etc/apt/sources.list.d/gcsfuse.list
curl https://packages.cloud.google.com/apt/doc/apt-key.gpg | sudo apt-key add -
sudo apt-get update
sudo apt-get install gcsfuse
sudo nano /etc/fuse.conf
gcsfuse -o allow_other --gid 0 --uid 0 --file-mode 777 --dir-mode 777 --key-file /path_to_your_keyFile_that_you_just_uploaded.json  nameOfYourBucket /path/to/mount